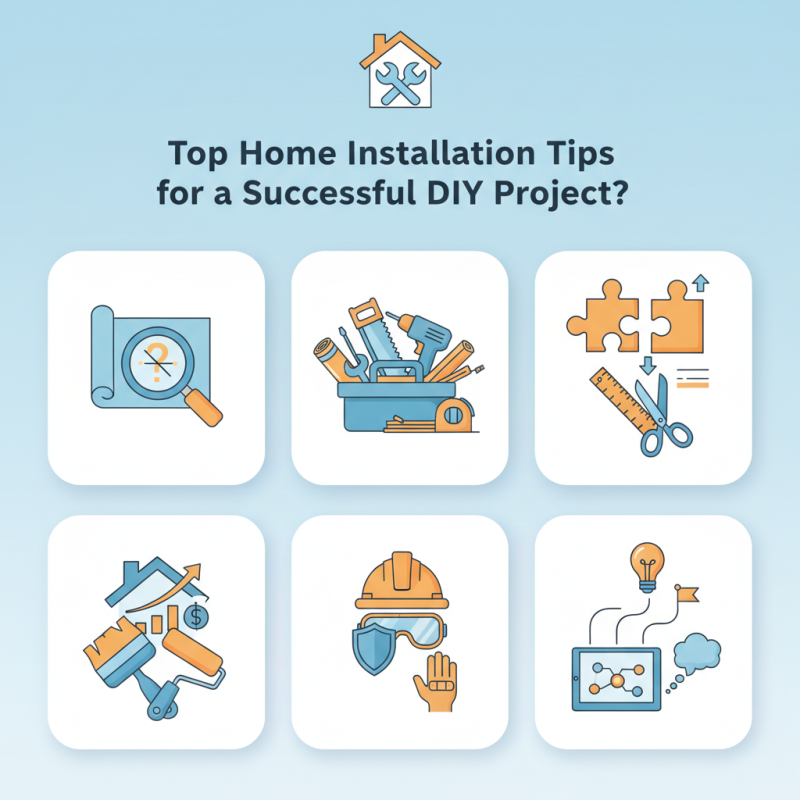
Top Home Installation Tips for a Successful DIY Project?
Embarking on a DIY project can be both exciting and daunting. Many homeowners crave the satisfaction of completing a task themselves. However, home installation can pose challenges that require careful planning and execution. With the right tips, you can turn these challenges into triumphs.
Understanding your project is crucial. Gather tools and materials ahead of time. This preparation can save you from unnecessary delays. Additionally, remember that mistakes are part of the learning process. Each misstep provides valuable insight for future installations. For instance, measuring twice and cutting once might not always eliminate errors, but it can certainly reduce them.
Proper installation not only enhances your home’s aesthetics but also increases its value. Take note of safety measures to protect yourself during the process. Seek guidance from reliable online resources or professionals when in doubt. Home installation is rewarding, but it can also be a humbling experience. Embrace the journey and learn from every step you take.
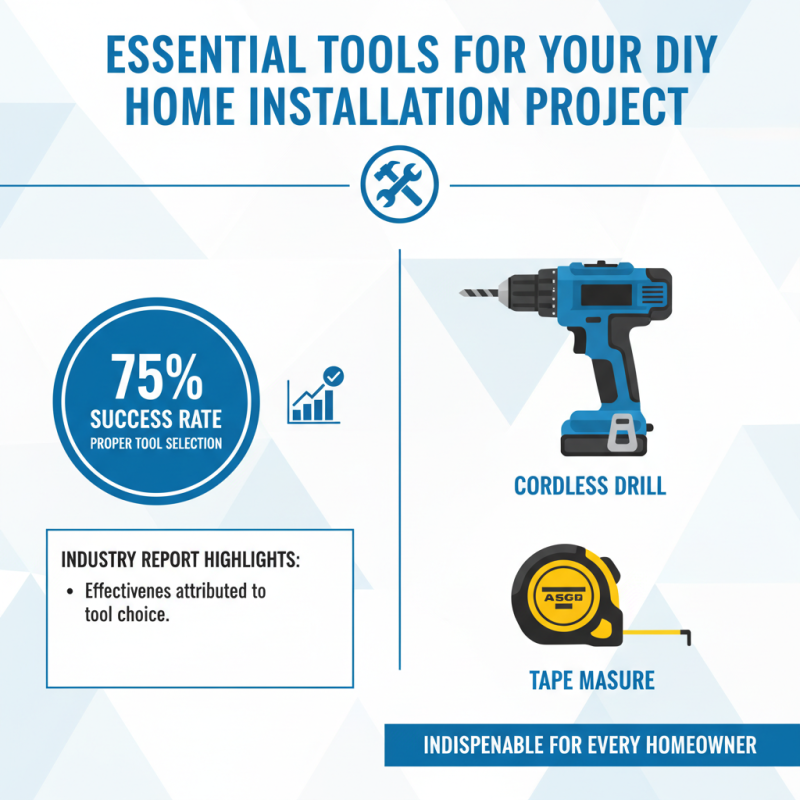
Essential Tools for Your DIY Home Installation Project
When diving into DIY home installation, having the right tools is essential. A recent industry report highlights that 75% of successful projects attribute their effectiveness to proper tool selection. Among the must-haves are a reliable cordless drill and a tape measure, which every homeowner should consider indispensable.
Furthermore, a quality level can save you from costly mistakes. According to the National Association of Home Builders, misaligned installations account for nearly 30% of DIY project failures. A simple tool like a laser level ensures you achieve precision. Additionally, having safety gear on hand, like goggles and gloves, cannot be overlooked. Even minor accidents can derail your project and lead to injuries.
Involving yourself in a DIY project can be gratifying but it also demands respect for safety and precision. Many beginners underestimate the time and effort needed for certain tasks. For instance, tasks that seem simple, like installing shelves, often require more than just basic tools. Planning and preparation may take longer than execution itself. Embracing this reality will not only safeguard your project’s success but also minimize frustrations along the way.
Planning Your DIY Project: Steps to Ensure Success
Planning your DIY project requires careful thought and organization. A survey from the Home Improvement Research Institute indicated that over 60% of DIY enthusiasts encounter challenges during their projects. Understanding these challenges helps you prepare better. Define clear goals for what you want to achieve. Identify your budget first; unexpected costs can derail your efforts. Many DIYers underestimate project expenses, leading to stress and frustration.
Gathering the right tools and materials is crucial. The same research reveals that approximately 30% of DIY projects fail due to inadequate tools. Take the time to create a comprehensive list. Prioritize quality materials that suit your project needs. Inadequate planning can result in wasted time and effort. If you find yourself stuck, don’t hesitate to seek advice from online communities or forums. Sharing frustrations can result in possible solutions.
Set a realistic timeline. A study by the Joint Center for Housing Studies found that over 40% of DIY projects take longer than expected. Impatience can lead to careless mistakes. Break tasks into manageable steps. Allow time for adjustments and mistakes. Accept that not every aspect will go perfectly. This mindset will foster a positive DIY experience and can lead to valuable learning opportunities.
Safety Precautions to Consider Before Starting
Before starting your DIY project, safety precautions are crucial. Ensure you have the right gear. At a minimum, wear safety goggles and gloves. These protect your eyes and hands from debris and sharp objects. A hard hat may be necessary for overhead work.
Check your workspace for hazards. Remove clutter that could cause trips or falls. Ensure that your area is well-lit. Poor lighting can lead to mistakes or accidents. Additionally, keep a first aid kit nearby. Accidents can happen, and being prepared helps.
Understand your tools. Many people dive into projects without proper knowledge. Read manuals and watch tutorials if needed. Misusing tools can lead to severe injuries. If you feel unsure, seek assistance. Don’t hesitate to ask for help from an experienced friend. Reflect on what went wrong if you encounter difficulties. Learning from mistakes is essential in DIY projects.
Top Home Installation Tips for a Successful DIY Project
| Tip |
Description |
Safety Precautions |
| Measure Twice |
Always double-check your measurements before cutting or installing. |
Use a reliable measuring tape and marking tool. |
| Read Instructions |
Thoroughly read the instructions provided with installation kits. |
Follow safety guidelines as mentioned in the manual. |
| Wear Safety Gear |
Always wear appropriate safety gear, including gloves and eyewear. |
Protect yourself from sharp objects and debris. |
| Use the Right Tools |
Ensure you have all necessary tools before beginning the project. |
Inspect tools for defects before use. |
| Take Breaks |
Don’t rush; take breaks to avoid fatigue and mistakes. |
Stay hydrated and rest to maintain focus. |
Techniques for Accurate Measurements and Installation
Accurate measurements are key to any successful DIY project. Using a tape measure is essential, but ensure you measure twice. Mistakes often arise from simple miscalculations. Always keep your measuring tools clean and checked for accuracy. A small error can lead to big problems later.
When it comes to installation, attention to detail is crucial. Mark your cut lines clearly, and double-check your alignment before making cuts. Using a level can help ensure your installation is straight. Don't hesitate to pause and reassess your work. Often, it’s the small adjustments that lead to a polished finish.
Consider the layout carefully. Visualize the entire project before starting. Sometimes, what seems perfect on paper doesn't translate well in real life. Allow yourself the flexibility to adapt as you go. Reflecting on past projects can also inform your current work. Mistakes are part of the learning process. Embrace them and improve with each step.
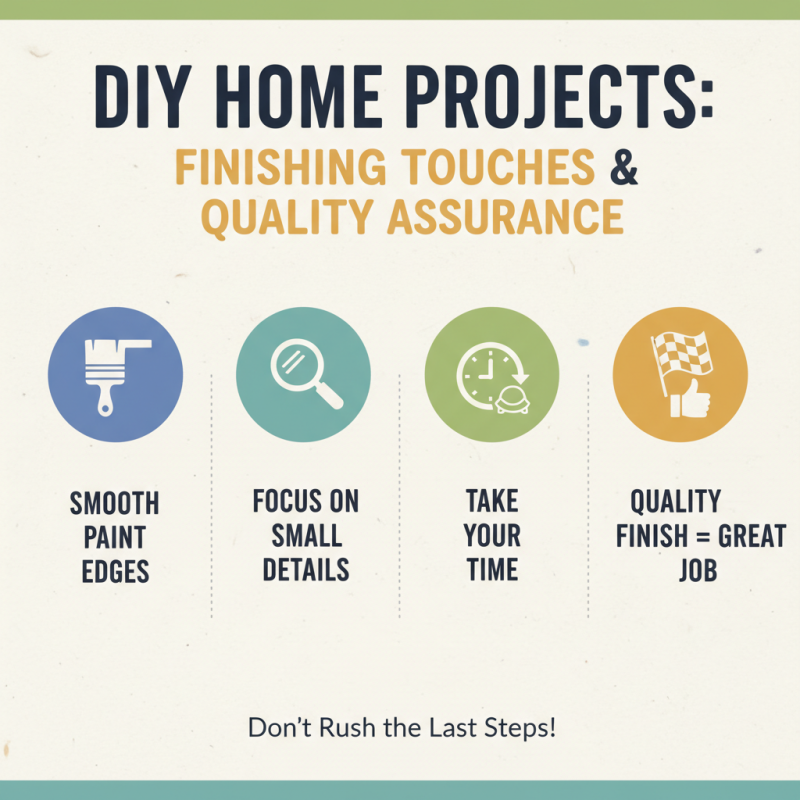
Tips for Finishing Touches and Quality Assurance
When it comes to DIY home projects, finishing touches matter. They can make the difference between a good job and a great one. Pay attention to the small details. For example, ensure that paint edges are smooth and clean. A poorly applied coat can ruin the entire look. Take your time with these last steps. Rushing often leads to mistakes.
Quality assurance is crucial in DIY projects. After finishing, take a step back and evaluate your work. Look for imperfections that may not have been obvious during the process. Check for gaps in flooring or uneven surfaces. If something seems off, don’t hesitate to make adjustments. Sometimes, you’ll need to redo a section. This reflects your commitment to quality.
Trust your instincts while assessing your work. You may feel satisfied, but others might notice flaws. Get a second opinion from a friend or family member. Their fresh perspective can highlight issues you missed. Remember, even experienced DIYers encounter challenges. Reflection on your work is part of the learning journey. Embrace both successes and setbacks for better results next time.